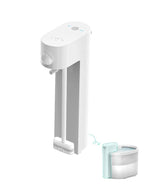
Keeping your home clean while ensuring your dog stays healthy can be a challenge, especially when it comes to their paws. Dogs love to explore the outdoors, but their adventures often leave their paws dirty, muddy, or even exposed to harmful substances. Learning how to clean dog paws before coming inside is essential for maintaining a clean living space and protecting your furry friend from potential health risks. This guide will walk you through everything you need to know about paw cleaning, from why it’s important to practical tips and techniques.
Why Cleaning Your Dog’s Paws is Important
Dogs’ paws are their primary point of contact with the ground, making them susceptible to dirt, bacteria, and chemicals. Whether your dog has been walking on grass, pavement, or muddy trails, their paws can pick up a variety of substances that can be harmful if brought indoors. Here are some key reasons why cleaning your dog’s paws is crucial:
- Prevents the Spread of Dirt and Germs: Dirty paws can track mud, dirt, and bacteria into your home, contaminating floors, carpets, and furniture.
- Protects Against Toxins: Paws can pick up chemicals from pesticides, fertilizers, or road salt, which can be harmful if ingested or absorbed through the skin.
- Reduces Allergens: Pollen, dust, and other allergens can cling to your dog’s paws, potentially triggering allergies in both pets and humans.
- Maintains Paw Health: Regular cleaning helps prevent infections, irritations, and injuries caused by debris or foreign objects lodged between the toes.
Essential Tools for Cleaning Dog Paws
Before diving into the cleaning process, it’s important to gather the right tools. Having the proper supplies on hand will make the task quicker and more efficient. Here’s a list of essential items:
- Mild Dog Shampoo or Paw Cleaner: Use a gentle, pet-safe cleanser specifically designed for paws.
- Warm Water: Lukewarm water is ideal for rinsing paws without causing discomfort.
- Soft Towels or Washcloths: These are useful for drying paws after cleaning.
- Paw Wipes: Pre-moistened wipes are convenient for quick cleanups.
- Paw Soak Bowl: A shallow container filled with water can help remove stubborn dirt.
- Brush or Comb: Use these to remove debris from between the toes.
Step-by-Step Guide to Cleaning Dog Paws
Now that you have the necessary tools, let’s go through the step-by-step process of cleaning your dog’s paws before they come inside:
Step 1: Prepare the Cleaning Area
Set up a designated area near your entryway for paw cleaning. This could be a mat, towel, or a small station with all your supplies. Having everything ready will make the process smoother and less stressful for your dog.
Step 2: Inspect the Paws
Before cleaning, take a moment to inspect your dog’s paws for any cuts, scrapes, or foreign objects like thorns or pebbles. If you notice anything unusual, address it before proceeding with cleaning.
Step 3: Remove Loose Dirt
Use a brush or comb to gently remove any loose dirt, mud, or debris from your dog’s paws. Pay special attention to the spaces between the toes, as these areas can trap dirt and cause discomfort.
Step 4: Rinse or Soak the Paws
For heavily soiled paws, consider using a paw soak bowl filled with warm water. Let your dog stand in the water for a few seconds to loosen the dirt. Alternatively, you can rinse their paws under a gentle stream of warm water.
Step 5: Clean with a Mild Cleanser
Apply a small amount of mild dog shampoo or paw cleaner to your hands or a washcloth. Gently massage the cleanser into your dog’s paws, focusing on the pads and between the toes. Avoid using harsh soaps or human products, as they can dry out or irritate your dog’s skin.
Step 6: Dry Thoroughly
After cleaning, use a soft towel or washcloth to dry your dog’s paws completely. Moisture left between the toes can lead to bacterial growth or fungal infections. Make sure to pat gently to avoid causing discomfort.
Step 7: Apply Paw Balm (Optional)
If your dog’s paws are dry or cracked, consider applying a pet-safe paw balm to moisturize and protect the skin. This step is especially helpful during winter or in dry climates.
Tips for Making Paw Cleaning Easier
Cleaning your dog’s paws doesn’t have to be a hassle. Here are some tips to make the process more enjoyable for both you and your pet:
- Start Early: Introduce paw cleaning to your dog as a puppy to help them get used to the routine.
- Use Positive Reinforcement: Reward your dog with treats or praise after each cleaning session to create a positive association.
- Keep Supplies Handy: Store your paw cleaning tools in an easily accessible spot near the door.
- Be Gentle: Handle your dog’s paws with care to avoid causing discomfort or anxiety.
- Make It Quick: Keep the cleaning process short and efficient to prevent your dog from becoming impatient.
When to Seek Professional Help
While regular paw cleaning is something most pet owners can handle at home, there are situations where professional assistance may be needed. If you notice persistent redness, swelling, or signs of infection on your dog’s paws, consult your veterinarian. Additionally, if your dog shows extreme resistance to paw cleaning, a professional trainer or groomer can provide guidance on how to make the process less stressful.
By incorporating paw cleaning into your daily routine, you can keep your home cleaner and ensure your dog’s paws stay healthy and comfortable. With the right tools, techniques, and a little patience, this simple task can become a seamless part of your dog’s outdoor adventures. Start today and enjoy the benefits of a cleaner home and a happier, healthier dog!

