Keeping your robot cat litter box clean is essential for both your pet's health and the longevity of the device. A well-maintained litter box ensures that your cat remains happy and healthy, while also preventing any malfunctions in the automated system. In this guide, we will walk you through the process of cleaning your robot cat litter box, providing you with all the necessary steps and tips to keep it in top condition.
Why Cleaning Your Robot Cat Litter Box is Important
Regular cleaning of your robot cat litter box is crucial for several reasons. First and foremost, it helps maintain a hygienic environment for your cat. Cats are naturally clean animals, and a dirty litter box can lead to stress and health issues. Additionally, a clean litter box ensures that the robot functions efficiently, preventing any clogs or malfunctions that could arise from accumulated waste.
Step-by-Step Guide to Cleaning Your Robot Cat Litter Box
Follow these steps to ensure your robot cat litter box is thoroughly cleaned:
Step 1: Turn Off and Unplug the Device
Before you start cleaning, make sure to turn off and unplug the robot cat litter box. This is a crucial safety measure to prevent any accidents or electrical issues.
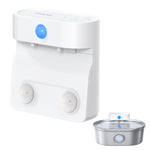
Step 2: Remove the Waste Tray
Most robot cat litter boxes come with a detachable waste tray. Carefully remove the tray and dispose of the waste in a sealed bag. This will prevent any odors from spreading.
Step 3: Empty the Litter
Next, empty the litter from the box. Depending on the type of litter you use, you may need to dispose of it or clean it if it's reusable. Make sure to follow the manufacturer's guidelines for the specific type of litter you use.
Step 4: Clean the Interior
Use a mild detergent and warm water to clean the interior of the litter box. Avoid using harsh chemicals as they can be harmful to your cat. Scrub all surfaces thoroughly to remove any residue or odors.
Step 5: Clean the Sensors and Moving Parts
Pay special attention to the sensors and moving parts of the robot cat litter box. These components are crucial for the device's functionality. Use a soft cloth and a gentle cleaning solution to wipe them down, ensuring they are free from any debris or buildup.
Step 6: Dry the Components
After cleaning, make sure to dry all components thoroughly before reassembling the litter box. Any moisture left behind can lead to mold or mildew, which can be harmful to your cat and the device.
Step 7: Reassemble and Test
Once everything is dry, reassemble the robot cat litter box and plug it back in. Run a test cycle to ensure that everything is functioning correctly. This will help you identify any issues before your cat uses the box again.
Tips for Maintaining Your Robot Cat Litter Box
Here are some additional tips to keep your robot cat litter box in excellent condition:
Regularly Check for Wear and Tear
Inspect the litter box regularly for any signs of wear and tear. Replace any damaged parts immediately to prevent further issues.
Use High-Quality Litter
Using high-quality litter can make a significant difference in the performance of your robot cat litter box. It helps reduce odors and clogs, making the cleaning process easier.
Keep the Area Around the Litter Box Clean
Ensure that the area around the litter box is clean and free from debris. This will prevent any foreign objects from interfering with the robot's operation.
Schedule Regular Deep Cleaning
In addition to regular cleaning, schedule a deep cleaning session at least once a month. This will help maintain the device's efficiency and prolong its lifespan.
By following these steps and tips, you can ensure that your robot cat litter box remains clean and functional, providing a comfortable and hygienic environment for your cat. Regular maintenance not only benefits your pet but also extends the life of your automated litter box, making it a worthwhile investment for any cat owner.