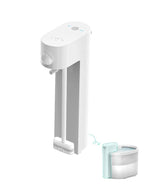
Installing an automatic soap dispenser can transform your bathroom or kitchen into a more hygienic and convenient space. Whether you're a DIY enthusiast or a beginner, this guide will walk you through the process step by step, ensuring a smooth and successful installation.
Why Choose an Automatic Soap Dispenser?
Automatic soap dispensers are becoming increasingly popular due to their touch-free operation, which helps reduce the spread of germs. They are perfect for homes, offices, and public spaces. Installing one is a simple way to upgrade your hygiene routine.
Tools and Materials You'll Need
Before you start, gather the necessary tools and materials. You'll need a screwdriver, measuring tape, pencil, drill, screws, and the automatic soap dispenser kit. Ensure you have all the components listed in the user manual.
Step 1: Choose the Right Location
Select a suitable location for your automatic soap dispenser. It should be easily accessible and near a power source if the dispenser is battery-operated. Use a measuring tape and pencil to mark the spot where you'll install the dispenser.
Step 2: Prepare the Surface
Clean the surface where you'll mount the dispenser. Ensure it's dry and free from dust or grease. This will help the adhesive or screws hold the dispenser securely in place.
Step 3: Mark the Mounting Holes
Hold the dispenser against the wall and use a pencil to mark the positions of the mounting holes. Double-check the alignment to ensure the dispenser will be level once installed.
Step 4: Drill the Holes
Using a drill, create holes at the marked spots. Be careful to drill straight and to the appropriate depth for the screws provided with your dispenser.
Step 5: Secure the Dispenser
Place the dispenser over the drilled holes and insert the screws. Tighten them with a screwdriver until the dispenser is firmly attached to the wall. Avoid over-tightening, as this could damage the dispenser.
Step 6: Install the Batteries
If your automatic soap dispenser is battery-operated, open the battery compartment and insert the batteries as per the user manual. Ensure the batteries are correctly placed to avoid any malfunction.
Step 7: Test the Dispenser
Once the dispenser is securely mounted and the batteries are installed, test it to ensure it's working correctly. Place your hand under the sensor to check if the soap dispenses properly.
Step 8: Fill the Dispenser with Soap
Open the soap reservoir and fill it with your preferred liquid soap. Be careful not to overfill, as this could cause leaks. Close the reservoir securely.
Step 9: Final Adjustments
Make any necessary adjustments to the dispenser's position or settings. Ensure it's at a comfortable height and that the sensor is responsive. Your automatic soap dispenser is now ready to use!
Maintenance Tips
To keep your automatic soap dispenser in top condition, clean it regularly and replace the batteries as needed. Check the soap levels periodically and refill as necessary to avoid running out at inconvenient times.
By following these steps, you can easily install an automatic soap dispenser and enjoy the benefits of a touch-free, hygienic handwashing experience. Upgrade your space today and make handwashing more convenient and efficient!

